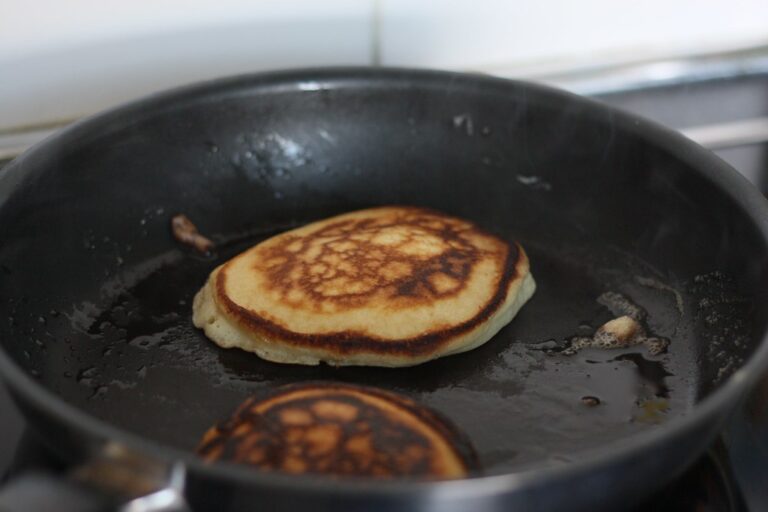
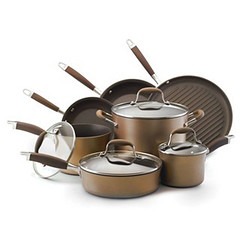
I have struggled with food sticking to my non-stick pans, but I’ve finally found some foolproof ways to prevent it.
In this article, I’ll share my top tips for keeping food from sticking to your non-stick pans.
From properly seasoning the pan to using the right cooking techniques, I’ll cover everything you need to know.
Say goodbye to frustrating cleanups and hello to perfectly cooked meals every time!
Key Takeaways
- Properly season your non-stick pan by heating it up, adding oil and salt, and rubbing the mixture all over the surface.
- Clean and maintain your non-stick pan by using mild dish soap and warm water, avoiding abrasive cleaners, and using wooden or silicone utensils.
- Choose oils with high smoke points, such as canola or avocado oil, for cooking in non-stick pans.
- Preheat the pan at medium-high heat, adjust the heat level as needed during cooking, and use cooking sprays or release agents to prevent sticking.
Properly Seasoning Your Non-Stick Pan
If you want to keep food from sticking to your non-stick pan, it’s important to properly season it. Using alternative seasoning methods can be a great way to achieve this.
One method is using oil and salt. Simply heat up your pan and add a tablespoon of oil, then sprinkle some coarse salt on top. Using a paper towel, rub the mixture all over the surface of the pan. This helps create a protective layer that prevents food from sticking.
Another option is using potato peels. Rubbing raw potato peels on the surface of your pan before cooking can also help prevent sticking.
Caring for older non-stick pans is equally crucial. Avoid using metal utensils as they can scratch the coating and diminish its effectiveness. Additionally, make sure to clean them gently with mild dish soap and avoid abrasive scrubbers that could damage the surface.
Using the Right Cooking Oil
When it comes to using the right cooking oil for non-stick pans, there are a few key points to consider.
First, choosing the best oils for non-stick surfaces is essential in ensuring that your food doesn’t stick and that you can easily clean your pan afterwards.
Additionally, understanding the heat tolerance of different oils is important in preventing them from reaching their smoke point and potentially releasing harmful substances into your food.
Best Oils for Non-Stick
The best oils for non-stick pans are those with a high smoke point, like canola or avocado oil. These oils can withstand high temperatures without breaking down and leaving a sticky residue on the pan.
However, if you’re looking to season your non-stick pan, there are other options to consider as well:
- Flaxseed oil: Known for its ability to create a natural non-stick surface when properly seasoned.
- Coconut oil: Adds a subtle flavor and creates a smooth cooking surface.
- Grapeseed oil: Has a neutral taste and high smoke point, making it ideal for various cooking methods.
When it comes to alternatives to traditional cooking oils, you can try using butter or ghee for added richness and flavor. Additionally, you can explore using vegetable broth or stock for sautéing vegetables or stir-frying. Experimenting with different oils and alternatives will help you find the perfect fit for your non-stick pans.
Heat Tolerance of Oils
To determine the heat tolerance of oils, you should consider their smoke points as this will help you avoid overheating them while cooking. The smoke point of oils refers to the temperature at which they start to break down and produce smoke. Different oils have different smoke points, with higher smoke points indicating greater heat tolerance.
Heat resistant oils are essential for high-temperature cooking methods like frying and sautéing. For example, avocado oil has a high smoke point of around 520°F, making it suitable for deep frying or searing. On the other hand, olive oil has a lower smoke point of around 375°F, so it’s better suited for medium-heat cooking methods like sautéing or roasting.
Knowing the smoke point of oils ensures that you choose the right oil for your desired cooking technique without risking overheating and compromising flavor or nutritional value.
Preheating the Pan
When it comes to preheating the pan, two key factors to consider are the optimal preheating temperature and the duration of preheating.
The optimal preheating temperature can vary depending on the type of food you are cooking, but generally, a medium-high heat works well for most dishes.
As for the duration of preheating, it is important to allow enough time for the pan to evenly distribute heat. Usually, around 2-3 minutes should suffice.
Optimal Preheating Temperature
Start preheating your non-stick pan at the recommended temperature to prevent food from sticking. Not only does preheating ensure that your food cooks evenly, but it also has several other benefits. Here are three reasons why optimal preheating is essential:
- Improved browning: Preheating your pan allows for better browning of meats and vegetables, enhancing their flavor and appearance.
- Reduced cooking time: When you start with a hot pan, food cooks faster, saving you valuable time in the kitchen.
- Minimized sticking: By preheating your non-stick pan, you create a slick surface that helps prevent food from adhering to the surface.
The optimal preheating time will vary depending on the type of stove and pan you are using. It’s important to follow the manufacturer’s instructions for best results.
Duration of Preheating
Make sure you give your pan enough time to preheat before adding any ingredients. The optimal preheating time can vary depending on the type of pan and the heat source you are using. However, a general rule of thumb is to allow your pan to preheat for at least 5 minutes before cooking.
Preheating your pan has many benefits. Firstly, it helps to evenly distribute heat throughout the surface of the pan, ensuring that your food cooks more consistently. Secondly, preheating allows for better browning and caramelization of ingredients, resulting in enhanced flavor and texture. Additionally, a properly preheated non-stick pan creates a barrier between the food and the surface, reducing the chances of sticking and making cleanup much easier.
Adjusting the Heat Level
To prevent food from sticking to your non-stick pan, you should adjust the heat level accordingly. This is a crucial step in achieving perfectly cooked meals without any residue left on your pan. Here are three tips to help you master the art of adjusting the heat level:
- Start with medium heat: When preheating your non-stick pan, begin with a medium heat setting. This allows for even distribution of heat and prevents the food from burning or sticking.
- Monitor cooking time: Keep an eye on the clock while cooking. Different foods require different cooking times, so it’s important to follow recipes or guidelines to avoid overcooking or undercooking your meal.
- Lower the heat when needed: If you notice that your food is browning too quickly or starting to stick, reduce the heat immediately. This will help prevent any further sticking and ensure that your dish turns out perfectly every time.
Using Cooking Sprays and Release Agents
Using cooking sprays or release agents can help prevent food from sticking to your non-stick pan. However, if you’re looking for alternatives to cooking spray, there are other options available.
One alternative is using oil or butter to coat the surface of the pan before cooking. This not only prevents sticking but also adds flavor to your dish.
Another option is using parchment paper or aluminum foil as a barrier between the food and the pan. This method works well for baking and roasting in particular.
The benefits of using release agents, whether it’s cooking spray or alternatives, are numerous. They make cleaning up much easier by reducing residue left on the pan and they help extend the lifespan of your non-stick coating.
Avoiding Abrasive Utensils
When it comes to avoiding damage to your non-stick pans, it’s important to choose gentle utensils that won’t scratch or scrape the surface. Non-abrasive cooking tools like silicone spatulas and wooden spoons are great options for this.
Gentle Utensil Recommendations
You can avoid damaging your non-stick pans by using gentle utensils. When it comes to selecting the right utensils, there are a few options that I have found to be particularly effective:
- Gentle Spatula Options: Look for spatulas made from materials like silicone or nylon. These materials are soft and won’t scratch or damage the surface of your non-stick pans.
- Silicone Spoon Recommendations: Silicone spoons are another great choice for non-stick pans. They are heat-resistant and won’t melt or warp when used on high temperatures. Plus, they have a smooth surface that glides effortlessly across the pan.
- Flexible Turner: A flexible turner is an excellent tool for flipping delicate foods like eggs or pancakes. Its thin edge easily slides under food without causing any scratches or marks on your non-stick pan.
Non-Abrasive Cooking Tools
One option for cooking without damaging your non-stick pans is to use non-abrasive cooking tools. When it comes to gentle cleaning, silicone spatulas are my go-to choice.
These spatulas are made from flexible and heat-resistant material, which makes them perfect for non-stick pans. They have a smooth surface that won’t scratch or damage the coating on the pan. I love using silicone spatulas because they easily glide through the food without sticking, making it easier to flip and stir ingredients while cooking.
Additionally, they are easy to clean as food particles don’t tend to stick to their surface. So if you want to keep your non-stick pans in pristine condition, opt for these gentle and effective silicone spatulas.
Preventing Pan Surface Damage
To prevent damaging the surface of your pans, it’s important to choose non-abrasive cooking tools. Here are three essential tips to prevent food residue and avoid metal utensils:
- Use silicone or wooden spatulas: These gentle utensils won’t scratch or scrape the non-stick coating on your pans.
- Opt for nylon or silicone whisks: Avoid using metal whisks that can leave marks and damage the smooth surface of your pans.
- Silicone tongs are a great alternative: Instead of using metal tongs that can cause scratches, opt for heat-resistant silicone tongs.
Using the Right Cooking Techniques
If you’re not using the right cooking techniques, your food may still stick to non-stick pans. One key aspect is maintaining the proper cooking temperature.
I’ve learned that heating the pan before adding any oil or ingredients helps create a non-stick surface. It’s essential to preheat the pan on medium heat and give it enough time to evenly distribute heat throughout.
Another crucial technique is avoiding overcrowding the pan. When there are too many ingredients in the pan, they release moisture, which can cause sticking. By properly spacing out your food, you allow air circulation and prevent excessive moisture buildup.
These simple yet effective techniques have made a significant difference in my cooking experience with non-stick pans, ensuring that my food no longer sticks and comes out perfectly cooked every time.
Cleaning and Maintaining Your Non-Stick Pan
Now that we know how to use the right cooking techniques with non-stick pans, let’s move on to cleaning and maintaining them.
Proper cleaning is essential for keeping your non-stick pans in good condition and ensuring their longevity. Here are a few tips for effectively cleaning your non-stick pan:
- Use mild dish soap and warm water: Avoid using abrasive cleaners or scouring pads that can damage the non-stick coating.
- Gently scrub with a soft sponge: To remove stubborn stains, gently scrub the surface of the pan using a soft sponge or cloth.
- Avoid metal utensils: Metal utensils can scratch the non-stick surface, so it’s best to use wooden or silicone utensils instead.
Avoiding High Acidic Foods
Remember, when using non-stick pans, it’s best to avoid cooking high acidic foods as they can damage the coating. Acidic foods like tomatoes and citrus fruits can cause the non-stick surface to deteriorate over time, leading to sticky residue that is difficult to remove.
To avoid this issue, I recommend using alternative cooking surfaces for high acidic foods. One option is to use stainless steel or cast iron pans instead of non-stick pans. These materials are more resistant to acid and won’t be affected by the high acidity of certain foods.
Another alternative is to line your non-stick pan with parchment paper before cooking acidic dishes. This will create a barrier between the food and the non-stick coating, preventing any potential damage.
Storing Your Non-Stick Pan Properly
To maintain the quality of your non-stick pan, it’s important to store it in a cool and dry place. I always make sure to follow these steps to keep my non-stick pans in top shape:
- Avoid stacking: Stacking non-stick pans can cause scratches and damage the coating. To prevent this, I store them separately.
- Use pan protectors: Placing pan protectors between stacked pans adds an extra layer of protection and prevents scratching.
- Hang them up: If you have limited storage space, consider hanging your non-stick pans on hooks or a pot rack. This not only saves space but also keeps them easily accessible.
Conclusion
In conclusion, keeping food from sticking to non-stick pans is essential for a hassle-free cooking experience. By properly seasoning the pan, using the right cooking oil, and preheating it correctly, you can prevent food from sticking.
Additionally, adjusting the heat level and using cooking sprays or release agents can further aid in this process. Remember to use the right cooking techniques and clean and maintain your non-stick pan regularly.
Avoid high acidic foods and store your pan properly to ensure its longevity. Happy cooking!


